


Installing pallet racking involves more than assembling frames and beams. From site preparation and structural assembly to anchoring and final inspections, each stage requires careful planning and compliance with Australian safety requirements. This guide covers the seven key installation steps, essential tools and the benefits of professional installation support.
1. Understanding the Pallet Racking Installation Process
Pallet racking installation involves more than assembling steel frames and beams. A properly installed system must support the intended loads, accommodate warehouse operations and meet relevant safety requirements.
The process typically begins with site preparation and layout marking, followed by frame and beam assembly, alignment checks, floor anchoring and final inspection. Before installation, several key factors need to be considered:
- Load requirements: Confirm pallet dimensions, weights and load distribution to determine suitable unit load, beam level and bay capacities.
- Forklift access and layout: Check aisle widths, lifting heights and operating clearances to ensure safe movement of forklifts, reach trucks and pallets.
- Floor suitability: Assess the concrete slab’s load-bearing capacity, floor condition and potential obstructions, including columns, doorways and overhead services.
- Installation planning and safety: Establish installation responsibilities, lifting procedures and work-area controls. Any changes to the approved design must be reviewed and authorised by a suitably qualified person.
SafeWork NSW recommends following the manufacturer’s installation instructions, providing suitable clearances for handling equipment and clearly displaying load limits.

>> Read More:
- FIFO vs LIFO: Key Differences and Warehouse Applications in Australia
- Reach Truck vs Forklift: Key Differences for Australian Warehouses
2. Pallet Racking Installation Requirements in Australia
Before installing pallet racking, it’s important to make sure the system is suitable for your warehouse and meets the relevant Australian safety and engineering requirements.
For conventional steel pallet racking, the main standards to consider are:
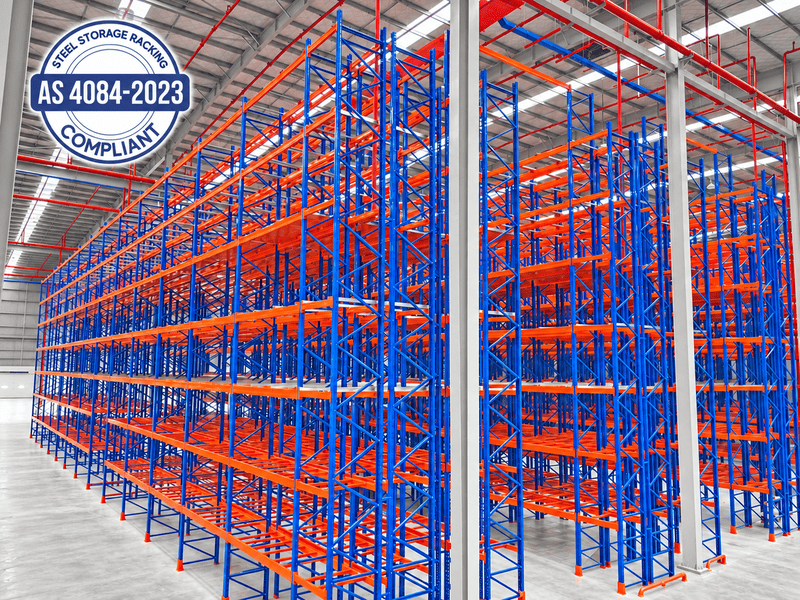
- AS 4084.1:2023 – Steel Storage Racking, Part 1: Design: Covers the structural design of applicable steel storage racking systems.
- AS 4084.2:2023 – Steel Storage Racking, Part 2: Operation and Maintenance: Covers matters such as installation, operating clearances, inspections and ongoing maintenance.
Before installation, floor suitability, warehouse access and nearby building services should be assessed. Clear responsibilities and work-area safety controls must also be established, with any design changes approved by a suitably qualified engineer.
Specific requirements may vary depending on the racking system and project conditions, particularly for specialised configurations that require additional engineering considerations.
3. Tools and Equipment Needed
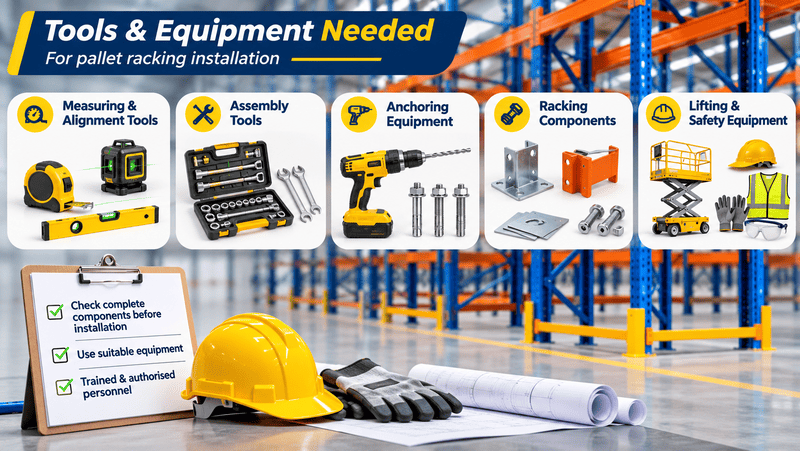
The equipment required will depend on the racking system, its height and the installation conditions. A typical project may involve the following:
- Measuring and alignment tools: Tape measures, chalk lines, laser levels, spirit levels and suitable surveying equipment to mark positions and check the structure.
- Assembly tools: Socket sets, spanners and other tools specified by the racking manufacturer.
- Anchoring equipment: Suitable drills, hole-cleaning tools and calibrated tightening equipment for installing the specified floor anchors.
- Racking components: Approved anchors, levelling plates or shims, fasteners, beam locking devices and any additional fittings required by the design.
- Lifting and safety equipment: Appropriate lifting equipment, access platforms where needed, working-at-height controls and task-specific personal protective equipment (PPE).
All equipment should be suitable for the job, with trained and authorised personnel carrying out the relevant work.
It’s also worth checking that every component is on site before installation begins. Missing beam locks, incorrect anchors or mismatched frame components can hold up the job and may affect the safety of the completed system.
>> Read More:
- What is an SKU? From product codes to smarter warehouses
- Pallet Racking Relocation: Move safely, Rethink storage
4. Step-by-Step Pallet Racking Installation Process
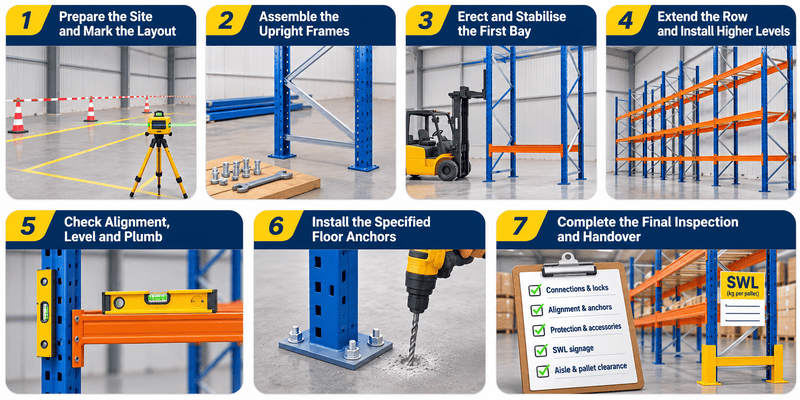
Pallet racking installation typically involves seven main steps, from site preparation to final inspection. The exact sequence may vary depending on the racking system, manufacturer’s instructions and approved installation plan.
1. Prepare the Site and Mark the Layout
Clear the installation area and establish safety barriers to restrict unauthorised access. Check the floor condition and identify any obstacles, including columns, doorways and overhead services.
Use tape measures, chalk lines or laser levels to mark rack positions according to the approved layout. Confirm that aisle widths and clearances accommodate forklifts, pallets and normal warehouse operations. Any discrepancies should be resolved before assembly begins.
2. Assemble the Upright Frames
Check all uprights, braces, base plates and fasteners against the approved specifications. Inspect components for damage, deformation or missing parts before assembly.
Connect the posts and bracing according to the manufacturer’s instructions, using the specified fasteners and connections. Preassembled frames should also be inspected before erection.
Avoid mixing components from different racking systems unless their compatibility has been verified and approved.
3. Erect and Stabilise the First Bay
Position the first upright frames using suitable lifting equipment and the approved erection method. Install the initial beams at the specified heights, ensuring the connectors are fully engaged and beam locking devices are fitted.
Check frame spacing and alignment against the drawings. Temporary supports or restraints may be required to maintain stability during assembly.
4. Extend the Row and Install Higher Levels
Continue adding upright frames and beams in the approved installation sequence. Position each beam at the specified elevation and secure it with the required locking devices. Install row spacers, ties, pallet supports and other accessories where specified. Check alignment regularly and maintain structural stability throughout assembly.
Any proposed changes to beam heights or configurations must be approved, as they may affect the racking’s load capacity.
5. Check Alignment, Level and Plumb
Check the completed sections for frame verticality, beam levels, row alignment and bay dimensions. Use appropriate measuring equipment to confirm that the structure meets the specified installation tolerances.
Where necessary, adjust uneven sections using manufacturer-approved levelling plates or shims. Any alignment issues outside the permitted tolerances must be corrected before acceptance.
6. Install the Specified Floor Anchors
Confirm the required anchor type, size, quantity and positions against the approved design. Check that the concrete slab is suitable and identify any embedded services or reinforcement before drilling.
Follow the anchor manufacturer’s instructions for drilling, hole cleaning, embedment and tightening. Use calibrated equipment where specified and inspect the completed fixings.
7. Complete the Final Inspection and Handover
Inspect the completed racking to confirm that all components are correctly installed and the system matches the approved design. Key checks include:
- Beam connections and locking devices
- Frame alignment and floor anchors
- Rack protection and accessories
- Safe working load (SWL) signage
- Forklift access and pallet clearances
Resolve any defects before releasing the racking for loading. The handover should include approved drawings, load limits, operating instructions and damage-reporting procedures.
Once operational, regular visual checks and formal inspections by a competent person at intervals not exceeding 12 months are recommended in Australian safety guidance.
In summary, a successful pallet racking installation starts with a site assessment and an approved layout. From assembling and aligning the frames to anchoring the racks and completing the final inspection, each step helps ensure the system can support its intended loads and suit day-to-day warehouse operations. Professional installers can carry out the work in line with the approved design, the manufacturer’s instructions and relevant Australian safety requirements. Before loading the racks, confirm that the final inspection is complete and that your warehouse team has the approved drawings, load limits and operating instructions.